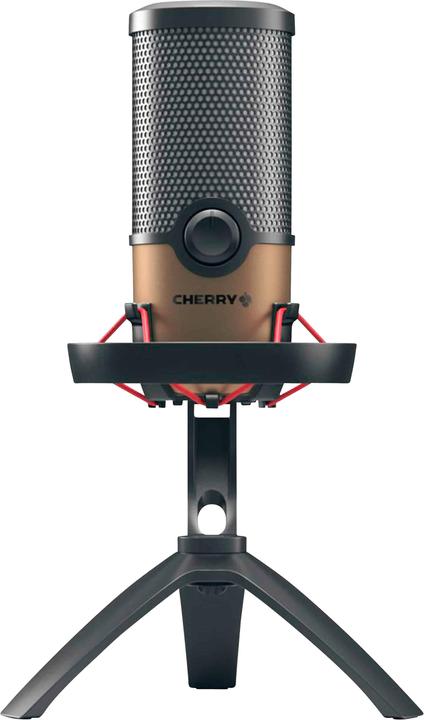
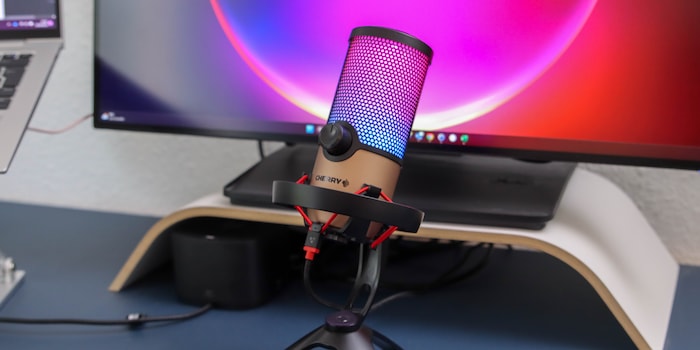
I put my first microphone to the test: the Cherry UM 9.0 Pro RGB
Up till now I’ve been content with the microphones on headphones or webcams. But that's all about to change! I’m curious to see if the RGB lighting on the Cherry UM 9.0 Pro can sway me.
Perfect for the target group of gamers and streamers, the Cherry UM 9.0 Pro RGB can glow in different colours. Luckily, the lighting can be turned off so I can concentrate on other things during the test. I play around with the gain control and try to take advantage of the four polar patterns.

Quick set up with USB
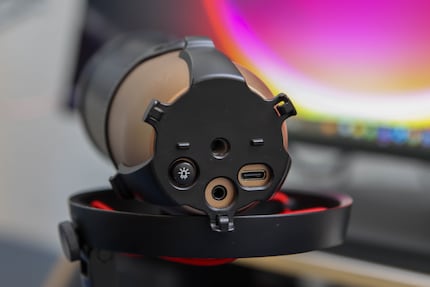
The Cherry UM 9.0 Pro RGB I got came with a metal tripod stand. It isn’t screwed on to the stand, but hangs in «bands», which are supposed to protect it from vibrations. I can tilt the microphone 45 degrees in one direction. If you prefer to mount it somewhere else, there’s a screw thread on the bottom.
Source: Jan Johannsen
I connect the microphone to my computer via a USB cable. You can only put the USB-C end into the microphone. To connect to the computer, you use the USB-A end. However, many modern notebooks don’t have the matching port. That means you would need to find a USB-C to USB-C cable that supports audio transmission. There’s no 3.5 mm audio output jack.
I really like the fact that Windows recognises the Cherry UM 9.0 Pro as a microphone straightaway. I can immediately select it as an audio source in Teams and other programs. I don’t need to install any additional software. The manufacturer doesn’t even offer any anyway.
A multi-user microphone
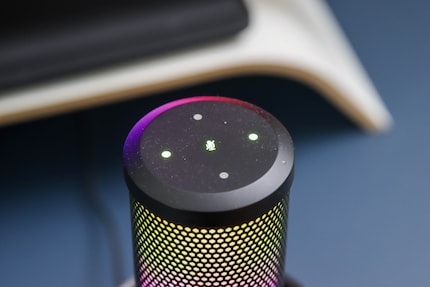
For recording, the Cherry UM offers four polar patterns. This means the microphone can focus on sound from one, two or four directions. It indicates which directions are currently active by the glowing dots on the top.
- Cardioid: in front, for one person
- Stereo: front right and front left, intended by the manufacturer for one person
- Bidirectional: front and rear, for two people sitting opposite each other
- Omnidirectional: all four directions, for group meetings or ASMR
A gain control lets me adjust the sensitivity of the microphone. If I press it, I switch between the four recording modes mentioned. To mute the UM 9.0 Pro, I tap the mute symbol (where the microphone has a cross through it). Dort, wo das durchgestrichene Mikrofonsymbol ist. To unmute it, I press it again.
Source: Jan Johannsen
The 3.5 mm jack of the Cherry UM 9.0 Pro is only an audio output for headphones. I use it to double-check what the mic picks up. I could even use the headphones to hear the sound of the connected computer. What’s important here is that you mute the microphone otherwise you’ll hear all the background noise.
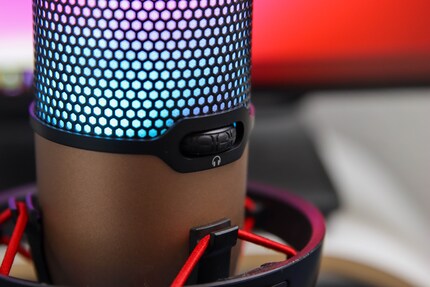
Source: Jan Johannsen
Its annoying when the PC gets the idea to select the microphone as the output device, although there are no headphones connected. At first, I was looking for ages trying to figure out why my sound wasn’t working. Now I know to look there first and change the speaker settings. Even so, it’s annoying.
This is how the Cherry UM 9.0 Pro RGB sounds
I compare the Cherry UM 9.0 Pro RGB with the previously used microphones in my notebook, headphones and webcam – these currently being the HP Elitebook 840 G9, the [Nothing Ear (2)](/page/nothing-ear-2-im-test-optisch-unveraendert-klanglich-verbessert-26969 und the Logi Brio 500.
I apologise to anyone who has had to listen to me recently on video calls through their headphones or laptop. The Cherry clearly demonstrates how much better I sound with a real microphone. But for my personal use the webcam does a pretty good job too.
If the Cherry UM 9.0 Pro has too much background noise, the gain control promises a remedy. With it, I can adjust the sensitivity for the recording. If I set it to less background noise, I have to come closer to the microphone when I talk. Otherwise, I’d also be quieter. I like the fact that Teams and other programs filter out the background noise. During video calls, I can sit comfortably and don’t have to adjust my setup.
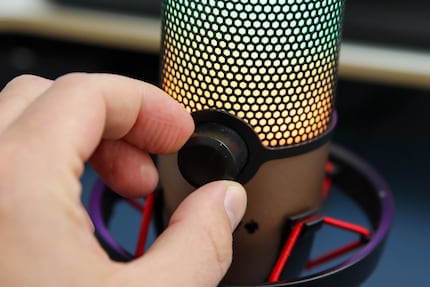
Source: Jan Johannsen
Cherry didn’t design the microphone for just one person. I can also put it between two or more people. You can hear how this sounds in the following examples.
Our small meeting booths in the office aren’t really soundproof. The microphone picks up some background noise. I assume the comparatively strong reverb is due to the bare walls of the small room.
In a larger room with more people and more furnishings, the reverberation is less audible. It’s also noticeable how important the control of the gain knob is to achieve a good volume of the voices.
The RGB lighting
The RGB at the end of the Cherry UM 9.0 Pro’s name signifies that the microphone can light up. There are seven colours to choose from and a slow colour change. But you can’t get custom shades. Depending on your setup, the colours can certainly make a difference to your picture quality. I personally find it frustrating when the microphone shines directly in my face. That’s why I usually have the RGB lighting turned off.
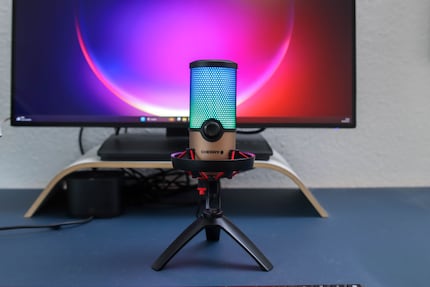
Source: Photo Jan Johannsen
Conclusion: an upgrade for my needs
The Cherry UM 9.0 Pro RGB is a definite plus in comparison to my previous set up. For video calls and infrequent visits to the podcast, it offers good sound quality. Setup and use require no prior knowledge or sound engineering training. I’m happy about that. The RGB lighting can be a nice gimmick, but I don’t need it.
The suspension of the microphone, on the other hand, causes slight concerns. The band is already very thin in one place and one bracket no longer clicks into place properly. This is annoying, because the band is constantly pulling on it. However, I can’t rule out that I just had bad luck with the test device.
You can always spend more money but for video calls I wouldn’t. And I’m not currently planning my own podcast or a career as a streamer. At most, the question remains whether I would also be satisfied with an even cheaper microphone.
Header image: Jan JohannsenAs a primary school pupil, I used to sit in a friend's living room with many of my classmates to play the Super NES. Now I get my hands on the latest technology and test it for you. In recent years at Curved, Computer Bild and Netzwelt, now at Digitec and Galaxus.


