
Guide
Michelle's iPad creative course: your start with Procreate
by Michelle Brändle

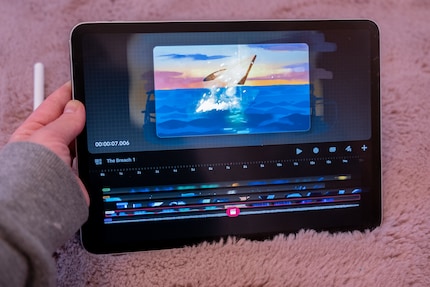
With Procreate Dreams, you now have an app to create and assemble animations in one place – from individual images to the finished clip.
In the Procreate Dreams app, you draw pictures and bring them to life. You can combine and process moving images, videos and soundtracks in the same app.
If you’re already using Procreate, you’re at an advantage. The app has a similar structure and has the same brushes available for drawing. You can also insert your illustrations from the original Procreate app directly into Dreams and process them further. The app has a simple structure, but many functions are somewhat hidden.
You’ll find the app in your iPad’s App Store. Other platforms aren’t supported. You pay a one-off fee of 20 francs or euros for the program. Thank goodness it’s not another annoying subscription model.
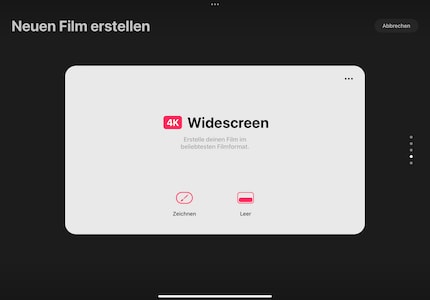
When you open the app, there are already three sample animations to view. You can create your own project using the button at the top right. Here you can choose from a number of popular formats. From movie landscape view to a smartphone portrait to a square for gifs. This can all be adjusted later too.
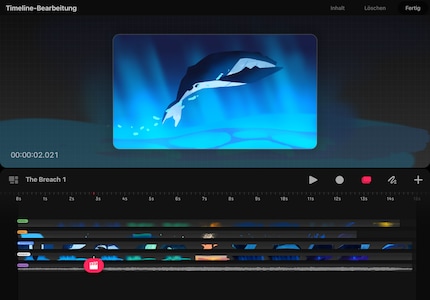
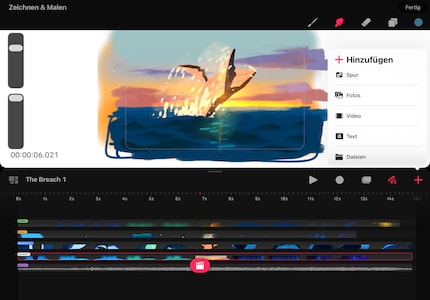
The examples are also very helpful for getting to grips with the app. They show how differently an animation can be structured. Using the example of an animation with a blue whale (The Breach), you can see how different timelines are superimposed: images, backgrounds, sound and special effects. You can zoom into these timelines with two fingers. You’ll then see individual frames from which the animation is made.
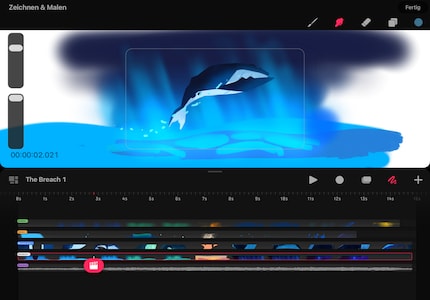
You can switch between two different modes to create your animation. One for drawing and one for timeline editing. You can also make various adjustments in the settings.
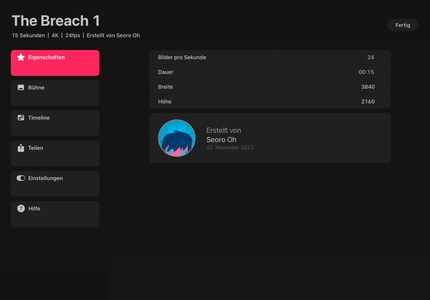
In the settings, you can also choose how animations should be played in the project: either in an endless loop, as a ping-pong variant or once each time you press play. From here you can export your project with information on image quality and format.
As an illustrator, I’ve rarely worked with timelines before. In Procreate Dreams, however, I understand the principle very quickly. Use your fingers or the stylus to select the desired locations, zoom in and out or move them as desired. What’s useful: when you press the play button, you only play the part of your animation that’s visible in the current section. This allows you to revise and view specific parts of your animation.
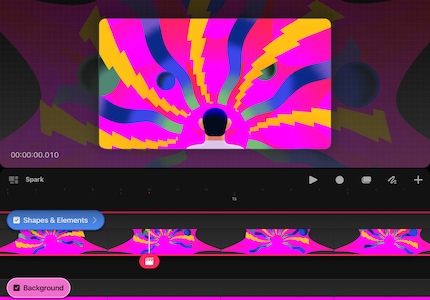
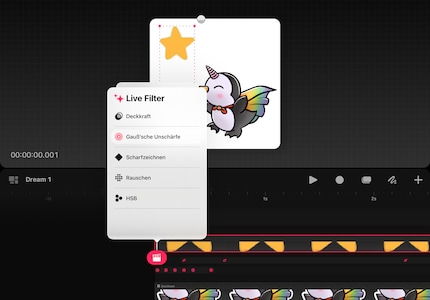
In a timeline, you can move an object very easily. Just click on the pink icon with the movie flap in the desired timeline and then on «Move». With the «Move and scale» command, a pink editing field appears around the object. You can now enlarge, reduce or move your object with your pen or finger. If you want to transfer this to the timeline, click on the record button first. It then directly records all the movements you make with the object. This is much easier than it sounds.
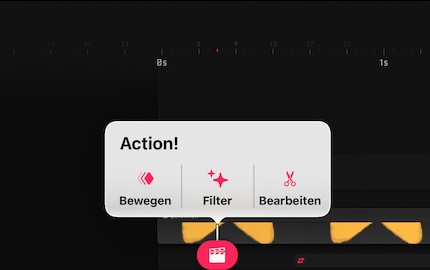
Under the same button, you’ll also find filters such as blurring, sharpening or changing the opacity. All these effects are also directly animated and can be edited in terms of intensity or moved around the timeline as required.
Drawing mode is kept simple and clear. Use the brush and swipe function to draw directly in the timeline where you want something to appear. As already mentioned in the chapter on timelines, you can also move and scale drawings created here using the movie fold button. It’s all clearly laid out, but is intended more for rough images and editing.
If you want to draw individual figures in detail and frame by frame, the flipbook is your choice. You’ll find the function somewhat hidden in drawing mode. There’s a grey tab between the canvas and timelines that you can pull down. This brings you to flipbook mode. It’s familiar, as Procreate had already introduced this function in the normal Procreate app under the name Animation Assistant.
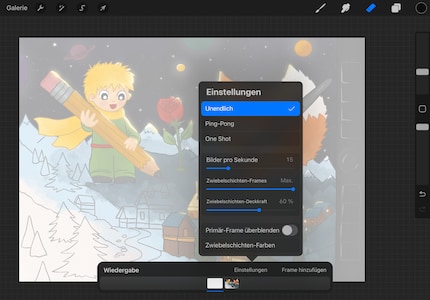
With flipbooks, you always see the previous, current and next frame. This way you draw your desired animation using the onion principle. You can also change the settings for this, even though they’re somewhat hidden. Click on the time display in the bottom left corner. There, you can also hide the onion layers or adjust their colour.
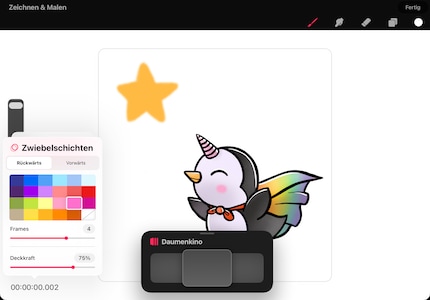
With the flipbook, you also have all of Procreate’s drawing tools, including the layer function. Close it by closing the black flipbook menu field with a cross. Then you return to your entire project and continue seamlessly.
Already have some experience with Procreate Dreams? Or do you have any questions? Go crazy in the comments!
Header image: Michelle Brändle
Ever since I learned how to hold a pen, I've been doodling away in bright colours. Thanks to my iPad, digital art has also become part of my life. That's why I love testing tablets – from the graphic design range to the regular kind. When I feel the urge to express my creativity without lugging lots of equipment, I go for the latest smartphones and start snapping away.
Practical solutions for everyday problems with technology, household hacks and much more.
Show all