Guide
Synology NAS Upgrade – 2.5 Gigabits with a USB LAN adapter
by Martin Jud

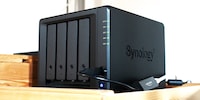
The BeeStation from Synology is basically a hard disk with a network connection. You can access it on your home network as well as via the internet. It doesn’t do much more – but that’s exactly what makes it special.
The Synology BeeStation is aimed at anyone looking for an uncomplicated, personal cloud storage solution and centralised photo management. However, you’ll have to do without the wide range of options offered by classic Network Attached Storage (NAS). So I wouldn’t describe the product as a NAS.
A Synology DiskStation, on the other hand, is exactly that. As a result, it’s also a small server that supports a wide range of software. The bottom line: the BeeStation is only made for storing and retrieving files. In addition, a single four terabyte (TB) drive means there’s no fail-safe. NAS with several drive bays and a corresponding RAID level have an advantage here.
During testing, the BeeStation surprises me in a few ways. As the setup and operation are kept simple, it’s also suitable for people who aren’t tech-savvy. I particularly like the fact that I can access it on the local network without an additional app thanks to the Server Message Block Service (SMB) that can be turned on.
At 820 grammes and 14.8 × 6.26 × 19.63 centimetres, the BeeStation is as compact as a book. This means it can also fit in tight spaces. During operation, its fan hums quietly, but I only hear this when I get closer. An LED on the front shows me the current status of the device.
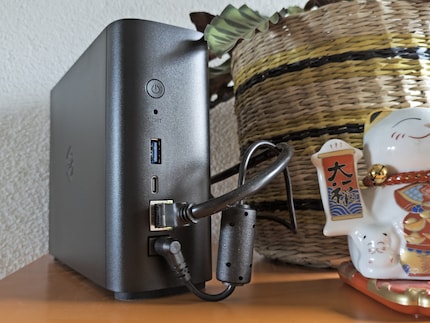
The back features a power button, reset button, a USB-A and USB-C port (both 3.2 Gen 1), a Gigabit Ethernet port (RJ45) and a power connection.
Here’s what’s inside:
The hard disk is a relatively quiet model (5,400 revolutions per minute), which currently costs around 110 francs/euros in our shop. According to tests by German online magazine Hardwareluxx, its maximum speed is around 200 megabytes per second when reading and 196 megabytes per second when writing.
A speed that can’t actually be achieved by the BeeStation due to the Gigabit port. If I use SMB to move a file directly from Windows Explorer to the hard disk, 112 megabytes per second (896 megabits) is the best I get. When downloading, I reach a maximum of 113 megabytes per second (904 megabits).
To set it up, I visit a website listed in the Quick Start Guide and follow instructions that even my grandma could’ve followed when she was still with us. Even connecting the device is illustrated step by step. When setting up, I have to create a Synology account or log into an existing one. I then enter a serial number and have to wait at least 15 minutes until everything is set up and updates are installed.
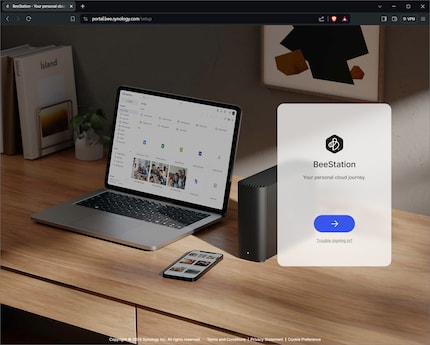
As a final step, I fittingly name my new NAS-like device BeeOK. Synology then informs me that I can either open BeeFiles and BeePhotos in the browser or use them as an app.
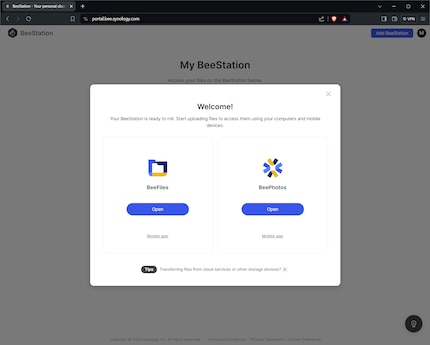
I’ll discuss the apps later. So I click away the message and turn to the system settings.
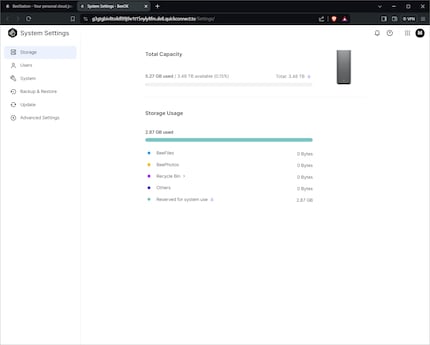
To keep things clear, here’s a list of all the settings. If you want to get an overview without explanations, just read the bold words:
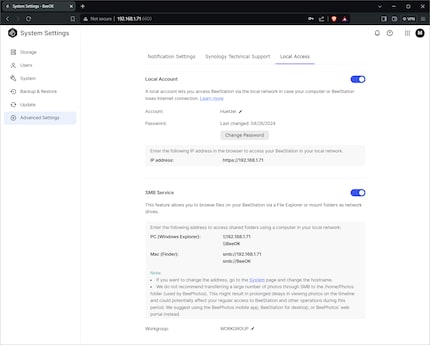
Incidentally, I only achieve a consistently high transfer rate of 112–113 megabytes per second when copying via SMB. Otherwise (web interface and apps), the transfer rate fluctuates between 94 and 107 megabytes per second.
The fact that Synology offers a manageable range of functions with the BeeStation is fine. However, I don’t like that there’s no option for an existing feature – you can’t deactivate remote access.
If you buy a Synology DiskStation (or a NAS from another manufacturer), it’s set up in the network. You first have to activate/set up the QuickConnect option to be able to access it from the internet. The BeeStation, on the other hand, is set up via the internet and can only be accessed directly from the network if you set up the corresponding option.
Since a device is a potential target as soon as it’s accessible from the internet, I only activate remote access on my Synology NAS on days when I need it. This isn’t directly possible with the BeeStation. Only indirectly, however, by blocking them in the firewall of my router.
To access your files anywhere, Synology offers the apps BeeFiles, BeePhotos and BeeStation for Desktop. The first two are available as a web application (can be used from any device with a web browser) and as an app for Android and iOS. For computers with Windows or macOS, BeeStation for Desktop is a software that combines the functions of BeeFiles and BeePhotos.
The BeeFiles interface doesn’t differ greatly from the applications of large cloud storage providers (Microsoft OneDrive, Google Drive, etc.). Operation is intuitive – and if you get stuck, Synology offers helpful instructions in the Knowledge Center. There, you learn how to transfer cloud storage to the BeeStation, how to use external drives and how to make a Time Machine backup.
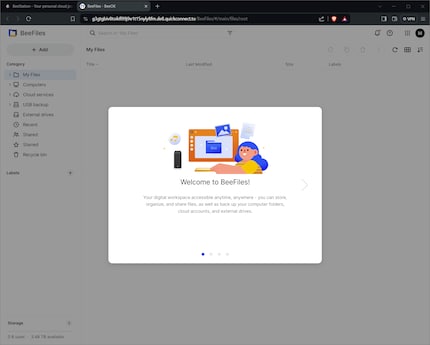
Here’s all you can do with BeeFiles (BeeStation for Desktop):
The BeePhotos user interface is also kept simple – or rather, reduced to the bare essentials. I like that, even if I miss a dark mode in the smartphone app. This is otherwise useful, as you can upload photos and videos, view them (slideshow possible) or share them via social media. You can also use it to create automated backups of smartphone camera shots.
When you upload photos to BeePhotos using the smartphone, desktop or web app, the file’s examined and moved by BeeStation using AI. This means that the application recognises what can be seen in images as well as where and when they were taken. Personal descriptions can also be added. And if one of the photos is upside down, you can rotate it directly with BeePhotos.
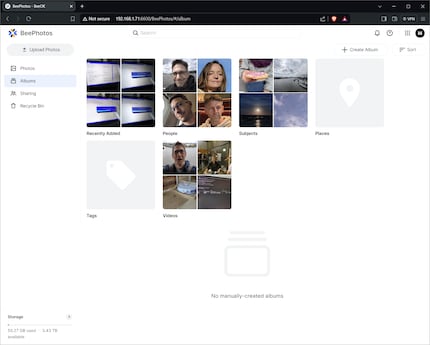
The manual and automatic labels help immensely, as they allow you to search for people, pets, aeroplanes and more – and find the desired shots within seconds. AI indexing also automatically creates albums for me.
If you click on a person’s album you want to see, you can assign names to different faces. This way, the search function constantly improves. As I generally don’t allow any location information when taking photos, my location album’s empty. When I click on the theme album, I can already see other automatically created sub-albums. There, BeePhotos created media collections of food, sky, nature, animals, plants, transportation, fast food, furniture and appliances for me.
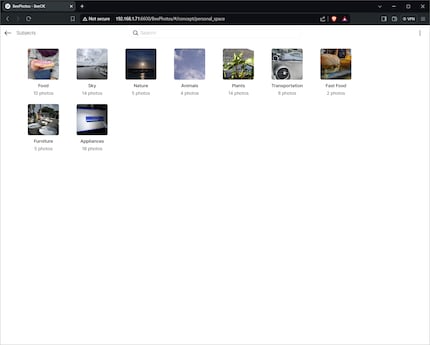
Of course, you can also create albums myself. Media stored on other cloud services, such as iCloud Photos or Google Photos, can also be imported. When uploading media, BeeStation creates thumbnails and stores the photos in a separate folder from the FileStation items, sorted by year and month. Accordingly, you can also view your pictures in the app using a helpful history over time. If you only want to view certain images/videos, there are quick filters in addition to the search function.
If you want to share albums, photos or videos, you can create a share link and add a password if required. You can also set a validity period for the link.
BeeStation offers personal cloud storage plus AI photo management. The software’s kept simple and easy to understand, same goes for the settings. The only thing I sorely miss is an option to deactivate remote access. At least it offers an on/off local network connection and an SMB service. Thanks to this, you can access devices in the same network directly via a network drive connection without an app.
The BeeStation works perfectly within its limits over several weeks of testing. With direct SMB access, I achieve up to 113 megabytes per second, exactly the same speed as a Synology DiskStation with a gigabit connection. Still, I don’t really warm to the device, as I get significantly more features from a DiskStation for a small extra charge. I can organise files and photos as well as operate a download station, a media server and much more with it.
If you’re more into complexity than convenience, I suggest using the practically identical device with an open operating system (DiskStation Manager). I’m talking about the Synology DiskStation DS124. It has the same processor as the BeeStation and costs 30 to 70 francs/euros more with the same 4-gigabyte capacity (depending on the hard disk manufacturer).
Pro
Contra
I find my muse in everything. When I don’t, I draw inspiration from daydreaming. After all, if you dream, you don’t sleep through life.