Windows tip: Folder Options from A to Z
Folder Options in Windows 11 Explorer are a collection of settings relating to folders and files. Whether display, search settings or click behaviour – in this Windows tip, we take a close look at every setting.
Want to display file extensions or hidden folders? Or deactivate double-clicking? How about changing search settings? Folder Options in Explorer (formerly Windows Explorer) offer dozens of settings for displaying files and folders under Windows 11. I’ll show you the most important ones and explain what you can do with them.
Opening Folder Options – two ways
You can access Folder Options in two ways – by clicking or using a command.
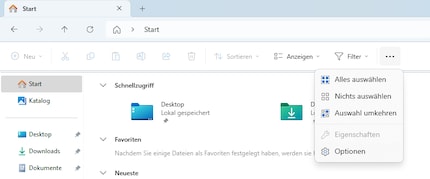
Clicking
Open Explorer using Windows+E, click on the three horizontal dots and select Options.
Source: Florian Bodoky
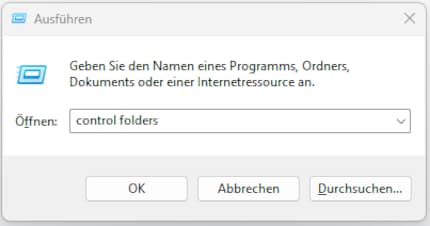
Command path
Press Windows key+R, and the command line appears. Write «control folders» and press Enter.
Source: Florian Bodoky
Folder Options: General
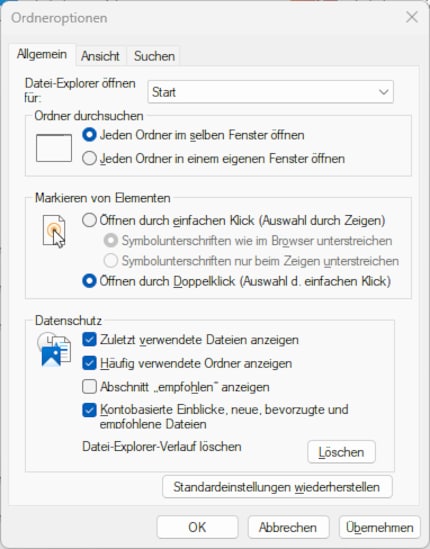
The first tab is called General. It’s divided into Browse folders, Click items as follows and Privacy.
Source: Florian Bodoky
In the drop-down menu, you can decide which start window should be displayed when you open the Explorer. One option is to choose This PC – all your drives will be displayed on the right.
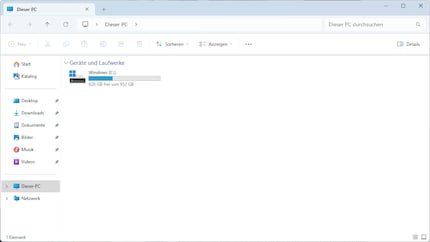
Source: Florian Bodoky
Alternatively, select Start. This used to be called Quick Access and shows you your pinned folders, your favourites and your most recently edited files.
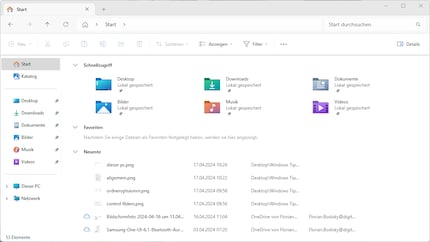
Source: Florian Bodoky
Browse folders
If you activate the Browse folders option, a separate window will open for each subfolder. If you have to click through folder structures, all folders will otherwise open in the same window (the path will be displayed at the top).
Click items as follows
Here you can choose whether you want to keep the familiar double-click or not. If you select Single-click to open an item (point to select), you can hover over an icon and open the folder/program/file with a single click. You can also decide whether the file name should be underlined, as with an internet link.
Privacy
Hide your file history under the Privacy option. Various categories of files are displayed under Start in the Explorer – recently used (Recent), frequently used, etc. These can be hidden here. You can also deactivate file recommendations that Explorer makes based on your usage here. If you deactivate everything, only fixed folders will be displayed for quick access.
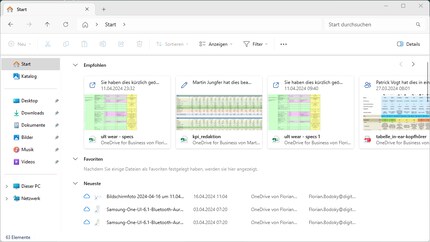
Source: Florian Bodoky
You can also make fixed folders disappear. To do this, right-click on the desired folder and select Remove from Recent.
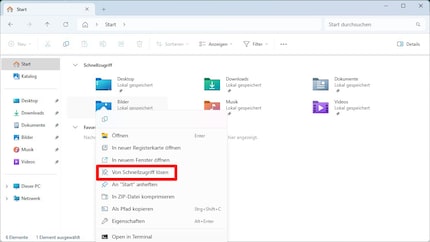
Source: Florian Bodoky
Folder Options: View
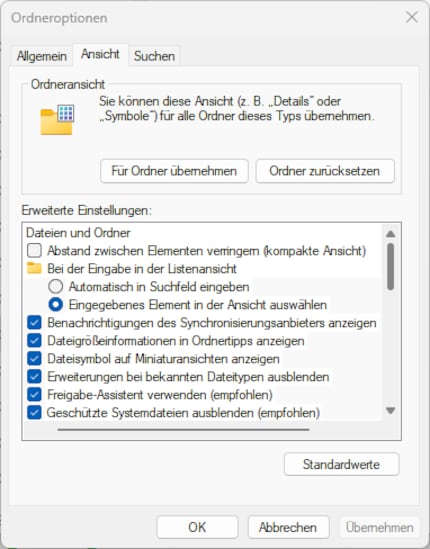
The middle tab, View, is the most comprehensive. Here you can define any options for view properties in folders, files and their navigation menus.
Source: Florian Bodoky
You may already be familiar with the top option. Decrease space between items (compact view). I mean, the name says it all. My point being that there’s a smaller space between file or folder icons than normal. The distance can also be increased, I’ve written a special Windows tip about this.
When typing into list view
If you have a folder with many different files, you get to choose. If you press a letter, it can either appear in the search window or the cursor jumps to the first file whose name begins with the letter you pressed. If there aren’t thousands of files, but only a few dozen, I find the second option more practical.
Show sync provider notifications
Again, the name says it all. If you’ve installed cloud provider software (e.g. OneDrive) and activated automatic synchronisation, Windows will show you when something is being synchronised, when synchronisation has been completed and so on. If you don’t want this, you can uncheck the box here.
Small additional tip: in Windows 10, advertising for OneDrive was displayed for a while. This could be hidden here. My colleague Martin Jud has written about the fact that advertising in Explorer may soon be making a comeback. Perhaps you can hide this here again.
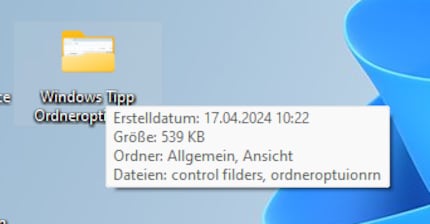
Display file size information in folder tips
If you click on a folder then release the mouse pointer, you’ll be shown information about that folder – creation date, size, content and so on. If you uncheck this box, only the creation date will be displayed.
Source: Florian Bodoky
Display file icon on thumbnails
This is a remnant of Windows 10 and is actually no longer needed with the new preview in Windows 11. In thumbnail view (Tiles view, Large icons and so on), the content of the file is displayed in a preview. At the bottom, Windows also displays the assigned default program (for example, Adobe Reader for PDFs and so on). If you uncheck this box, this’ll no longer appear.
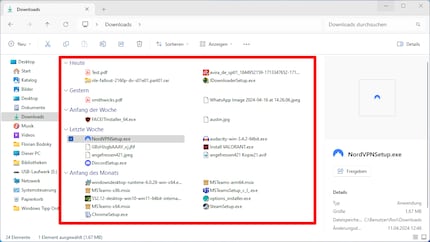
Hide extensions for known file types
«Hide extensions for known file types» is probably one of the best-known features in Folder Options. Files to which a standard program has been assigned can be easily recognised by their icon (PDF files, Word files and so on). As a result, no file extensions (Docx, PDF, etc.) are displayed there for reasons of clarity.
If you uncheck this box, file extensions will always be displayed.
Source: Florian Bodoky
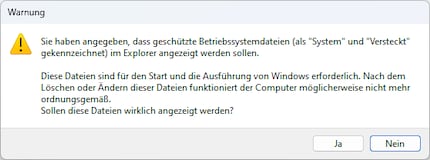
Hide protected operating system files
Protected system files are hidden files required for the clean operation of Windows. They aren’t displayed by default.
Source: Florian Bodoky
If these are changed or deleted – accidentally or on purpose – Windows may no longer work properly. So if you don’t know exactly what you’re doing, I’d advise you leave this box checked.
Always show icons, never thumbnails
If you’ve activated thumbnail preview, only the icon of the program with which you open the file will usually appear there.
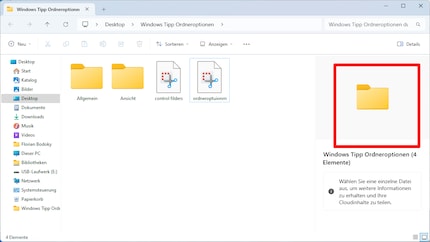
Source: Florian Bodoky
However, if you uncheck this box, the contents of the document will already be displayed in the preview.
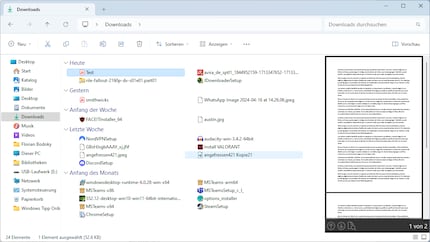
Source: Florian Bodoky
Hide folder merge conflicts
If you move a folder into another one, but a folder with the same name already exists there, the folders are automatically merged.
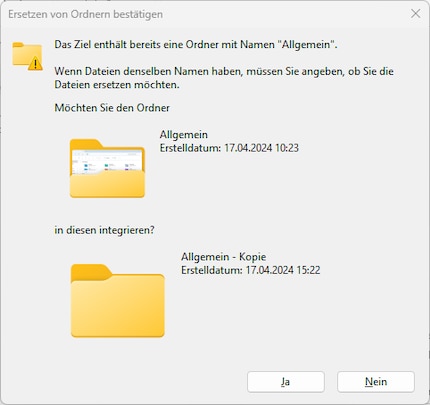
Source: Florian Bodoky
You can only decide which version you want for files with the same name. If you uncheck this box, Windows will also ask whether you want to merge folders with the same name (or replace a folder).
Use check boxes to select items
When you select a file, a small tick appears at the top left. If you deactivate this item, the element itself will still be marked, but without a tick.
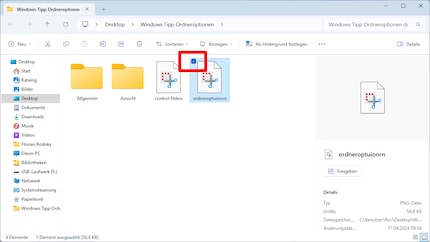
Source: Florian Bodoky
Show drive letters
Each drive has a name and a letter assigned to it. The system drive is usually named Windows and uses C:. If you uncheck this box, only the name will be displayed without the letter. If you work a lot with partitions, external drives or USB sticks, I’d recommend leaving the letter in.
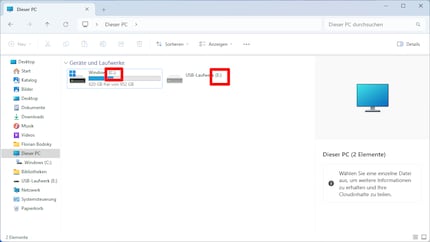
Source: Florian Bodoky
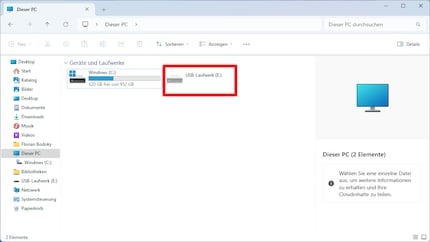
Hide empty drives
Does what it says on the tin. If you have an empty partition, for example, it won’t be displayed under Devices and drives. This option is activated by default.
Personally, I think this is a bit strange. I’ll remove the check mark here.
Show pop-up description for folder and desktop items
Remember the file size information from above? If you uncheck this box, no more information will be displayed when you select a folder. I’d leave the check mark on, the information can be useful.
Hidden files and folders
Source: Florian Bodoky
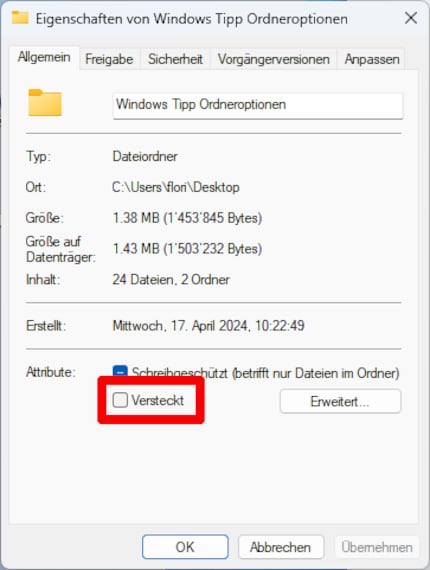
This point goes somewhat in the direction of the system files from just now. You can hide drives, folders and files (right-click on the folder, select Properties, then check Hidden). If you select the Show option here, you’ll still see the hidden folders.
Source: Florian Bodoky
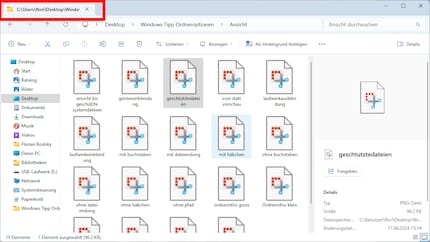
Display the full path in the title bar
If you check this box, you can select a file in Explorer and the storage path will be displayed in full in the tab at the top – drive, user profile and folder structure.
Source: Florian Bodoky
Restore previous folder windows at log-on
Under this option , you can set all open windows to remain open. Even if you’ve logged out of your user account, then log in again (without restarting).
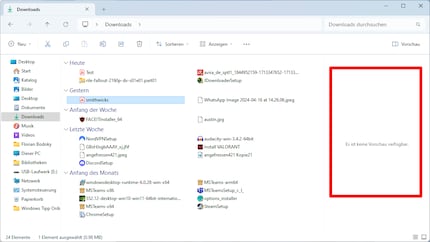
Show preview handlers in preview pane
This check mark ensures that the content preview option is available (remember the section on thumbnails?) If you uncheck this box, no content preview will be displayed for a file.
Source: Florian Bodoky
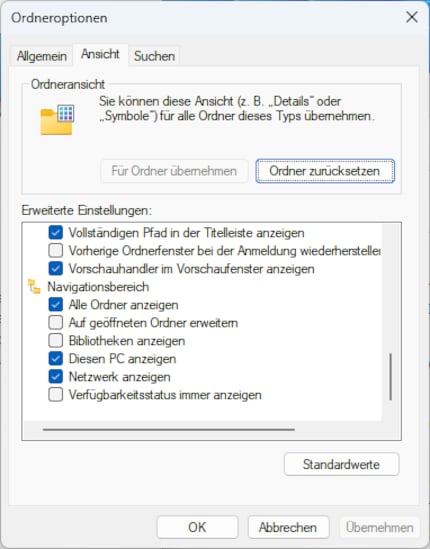
Navigation pane
In the Navigation pane, you decide which shortcuts, folders and drives are displayed on the left in the Explorer.
Source: Florian Bodoky
Search
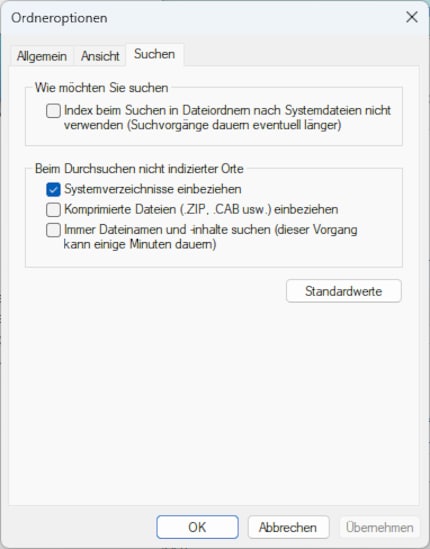
The third tab of the Folder Options deals with the various parameters for Windows search. You can let Windows search more thoroughly – it’ll just take longer. Or more superficially, then it goes faster.
How to search
Here you can decide whether you want to search for your term via the Windows search index or not. You can think of the index as a keyword database. Instead of searching the entire hard disk, Windows looks in the database to see if it has ever encountered such a term.
Source: Florian Bodoky
However, indexing doesn’t take place in all directories. If you omit the index, Windows searches more thoroughly, but the search also takes longer. As a rule, an index-based search will be sufficient.
When searching non-indexed locations
This point deals with searching without an index. If Windows searches in a directory that isn’t indexed, it’ll take longer. You can also tell Windows whether it should also search in system directories or by content (not just by name). Windows will even search for your search terms in compressed files. But this can take a while. If you’re only searching for files and folders that you created normally, I’d prefer index search (and leave out the top check mark).
50 people like this article
I've been tinkering with digital networks ever since I found out how to activate both telephone channels on the ISDN card for greater bandwidth. As for the analogue variety, I've been doing that since I learned to talk. Though Winterthur is my adoptive home city, my heart still bleeds red and blue.


